I’ve been meaning to do a detailed post on images, formats, and compression for a long time. But Kim here prompted me to finally go through with it!
I was using the Smush-it plugin to optimize images on my blog but it is disabled and the makers now want to charge a monthly fee. I notice you do not have an image reducer on your top 15 plugins you use and wondered what you use and what you recommend. Is it possible to code a solution?
Kim
Hi Kim!
The best and most reliable way to compress your images is not with a plugin. You want to do it before you even upload the images to your site. I’m just not a fan of relying on plugins for this when there are many tools/applications that will do the job for you directly on your computer.
Images affect your site’s loading time
First, let’s talk about why file size is important.
Your images affect your page’s loading time. Compressed images will make your site load faster, while uncompressed images can bring your site to a crawl.
How long it takes for your page to load goes on to affect your SEO and the experience of your readers. If your site takes 8 seconds to load, your readers aren’t going to want to sit around waiting; they’re going to leave. People do not have the patience for slow websites. Google understands this, which is why they also take loading time into consideration when ranking a website.
I’ve seen cases where a SINGLE image added 5+ seconds of loading time to the entire site. That’s unacceptable!
JPG, PNG, or GIF? Format matters
How you save your image is going to have a massive impact on the file size, which then impacts the loading time.
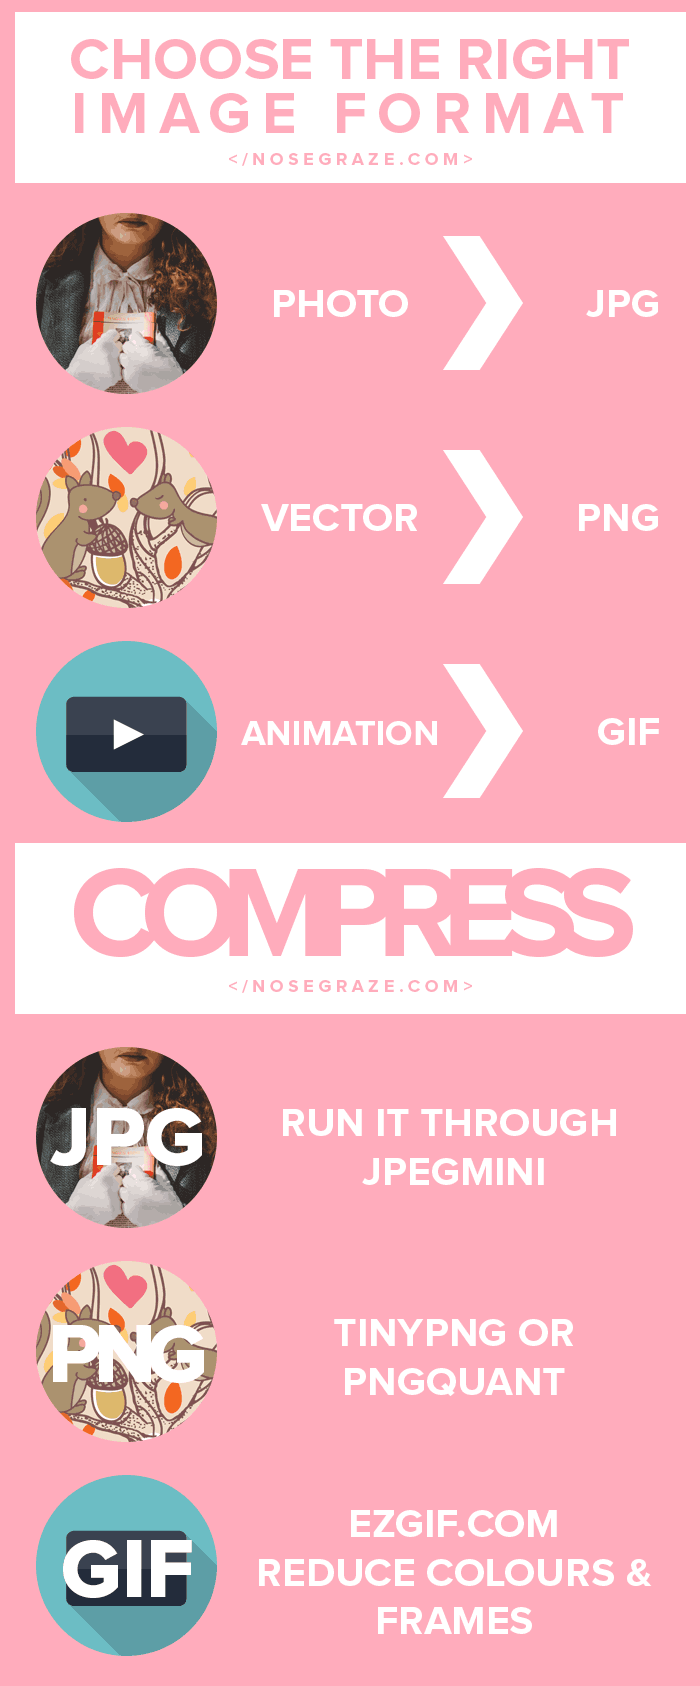
Here’s a chart which explains which file format you should use in which cases:
| Use | Format |
|---|---|
| Photograph | JPG |
| Vector | PNG |
| Image with just a few colours | PNG |
| Image with transparency | PNG |
| Animation | GIF |
File formats and file size
Not totally convinced? Let’s look at how the format can affect the file size.
Here’s an example of an uncompressed photograph saved as JPG and PNG:
The images look identical, but the PNG is so much larger! If an image looks exactly the same in two formats, always go with the one that has the smallest file size. If you’re saving images in Photoshop, you can see the file size when you Save for Web.
See how compression helps reduce file size
Now I’m going to run both of those images through my compression tools (which I’ll discuss later on!). Let’s see how they do now:
It’s kind of hard to tell since these images are small, but you can actually see the results of the compression in the PNG, whereas you can’t see any difference in the JPG. And yet, the JPG is still significantly smaller!
The JPG file format does a better job of handling millions of colours at a smaller file size.
But when it comes to vectors and fewer colours, PNG really shines
Here’s another image, but this time I chose a vector that only has a few colours. Now let’s see how the uncompressed versions compare:
This time the PNG is actually smaller! Plus, the PNG has the added bonus of having a transparent background.
Now let’s see what happens when we compress them both:
Look at how ridiculously small we got that PNG! 16.5 KB! That’s awesome. The JPG can’t even compare.
When you compress PNGs like this, you can sometimes see a difference in quality. Edges may look more crisp and have less of a subtle blend to them. So it’s up to you to study the before and after versions to see if the compression was worth it.
So how do you actually compress images?
Some people will tell you to open Photoshop, Save for Web, and reduce the quality of your JPG from 100 to about 75. While that does an okay job, it’s not the best.
- You have to fiddle with values.
- You have to spend time comparing the before and after.
It takes time, and time is money. There are better tools out there that can automatically compress images better and faster.
JPG: JPEGmini
When it comes to compressing JPEGs, JPEGmini is the best in the business. I bought the pro version (only $19.99) and use it with EVERY JPEG I upload.
The best thing about JPEGmini is that it always compresses your JPEGs as much as it can, while still making the image look IDENTICAL to the uncompressed version (to the human eye). So you can just run it through JEPGmini and not even worry about studying the before and after versions.
PNG: pngquant or TinyPNG
pngquant is what I use, but it’s a command-line utility, so if you’re looking for something user-friendly, you’re better off with TinyPNG. Both are fantastic options for compressing PNGs. TinyPNG even has a WordPress plugin called Compress JPEG & PNG images if you desperately want a plugin for the job.
GIF: EZGIF
I don’t use GIFs at all so I can’t really talk from personal experience on this one. But a quick Google search led me to EZGIF, which claims to support GIFs (including animated ones).
The main trick when it comes to compressing GIFs is to either reduce the number of colours or reduce the number of frames in the animation (or both).
Don’t forget about the size of the image—that matters too!
A huge mistake that many bloggers make is not considering the size (dimensions) of the image they’re using. The last thing you want to do is add an image to your sidebar that’s bigger than it needs to be.
Resizing the image in HTML or CSS does not make the file size smaller
If the width of your sidebar is 300 pixels, do not add an image that’s 1000 pixels wide. Yes, your theme may be coded in such a way that it forces the image to resize to fit the space and look like it’s only 300 pixels, but the browser still has to load the full size of 1000 pixels wide.
The larger your image, the larger the file size.
If you upload an image that’s being shrunk down (by CSS using img { max-width: 100%; } or HTML by using <img src="url" width="500">) then you’re adding unnecessary load time to your site. Even if the image looks small, the browser still has to load the whole thing if you’re just using HTML or CSS to resize it. Here’s a bit how it works:
- You click a website link and it starts loading the page.
- Your browser talks to the server and starts fetching the images, content, etc. that’s being shown on the page.
- It sees that the page is showing the image of a cat. Without looking at what size the web page tells it to be, your browser spends 5 seconds downloading the entire image.
- Then, as your browser is processing the page CSS and HTML and putting all the pieces together to show you, it realizes that it’s being told to only show that image of a cat at 200×200 pixels. So it quickly shrinks it down for you to make it look smaller.
- But at that point, it had already downloaded the full, huge, 1000×1000 pixel version anyway.
Only upload the image size that you want to show
If you want to add an image to your sidebar that’s displayed at 200×200 pixels, then resize your image down to 200×200 pixels in Photoshop (or another editing program) before adding it to your site. This will make the image’s file size much smaller and make your site load faster.










For what it’s worth, Smush.it replaced whatever integration broke in the free version, and is available again. I know it’s not ideal to use a plugin, I just know myself and learn from my mistake. When I was using a separate tool for compression, I constantly skipped that step. I just always forgot.
Smushing the majority of the images on my blog increased the speed by a crazy amount (I was shocked images were doing that much damage!), so even though I know having one more plugin slows things down, I’m okay with this being the most realistic option for me.
It might be worth looking into the other plugin I linked to, just to see if you like it better. I’m only saying that because I personally strongly dislike WPMU DEV, haha. I bought a few of their premium plugins and regret it immensely.
Thanks for this – with the new google mobile rating thing this answers a lot of questions I was going to ignore. BOOKMARKING!
You’re welcome!!!
I also love https://compressor.io/ which compresses all different kinds of image files!
I haven’t used that before, but I did stumble upon it when I was researching GIF compression. It definitely looks like a good option.
I use tinypng for both png and jpg. Gosh, I had no idea there’s such a major difference between these two!
Oh yeah—HUGE difference! It’s pretty crazy. If you’re not sure which option is best for what you’re doing, try saving in both file formats then compare the file size and quality.
I only knew I had to use PNG for transparent ones, but I didn’t realize it would do so great for vector as well! I use Kraken.io for compressing my images, and the lossy version usually does a great job of cutting down the file size of colors. But if it’s just a plain text on a colored background, the quality is usually too reduced, and I have to go with the lossless version. But both are good!
Yeah sometimes with text you can really see the difference. It looks far too crisp and sometimes you can see jagged edges, which aren’t cool.
I usually always compress, and then just see if I’m willing to sacrifice the quality for the file size. It’s just a judgement call for each case.
Yaaay, a GIF optimizer. I am gonna try it out.
I hope it works well for you.
FANTASTICALLY succinct post!!! You’ve summed up everything I’ve read!
I’m such a picture-whore that I struggle with NOT putting up large picture files on my old blog. It IS such a drag on load time, besides making your blog huge!!! And talk about a huge backup file!!!
I use Photoshop and start my files web-ready but I just don’t like how fuzzy they end up. I’m so glad you said that you need to play with the values. I’m going to use your values as a guide b/c you can get your .jpg’s so sharp and small – jealous
… and I’ll finally buy JPEGmini. This is only the 2nd time you’ve mentioned it
Thanks, again, for all you do for us!!!
Yeah playing with the quality in Photoshop can result in fuzzy images. I always save my images from Photoshop at 100% quality then drag them into JPEGmini and let them work their magic. JPEGmini’s goal is to reduce the file size as much as possible, while still making the image look exactly the same to the human eye. They’ve never failed me!
This was most helpful! Thank you! Sometimes a photo has taken a bit of time to load and I’ve never known why until now.
You’re welcome. It’s helpful to run your site through Pingdom once in a while: http://tools.pingdom.com/ They will calculate how large your site is (in terms of file size) and how long it takes to load. You can also look at the list they create to see how long each individual asset (like images) takes to load.
Thanks Ashley. I like this idea and appreciate the detailed post.
You’re welcome!
This might be the most helpful post you’ve posted since I’ve subscribed. This information is totally new to me. And YES, I’ve had a problem with loading time and had no idea that it could be the size of my photos. I took a look at all of my photos to see what their sizes were and some of them are huge!!! Hahahaha! Thanks so much for this.
I’m so glad this was helpful to you, Bryn. Now you know what to do moving forward!
I’ve always resized my photos, but I’ve never thought to compress them. I’ll have to look into the jpegmini since it would definitely make a difference, even if it’s just a tiny one.
It definitely makes a sizeable difference. And the bigger the image is, the bigger the difference compression can make!
Thanks again, Ashley. I need to go through my old posts and change my images whenever I get time. Do you think you should use a CDN, too, or just compress the images?
A CDN isn’t a replacement for compressing, so you would need to do both. But using a CDN can certainly help deliver assets more quickly to people. And signing up for CloudFlare is super easy and free.
Images are they SEO friendly on my site? I don’t like them so my web designer needs 1000 pixel size he said. I wanted to try three small ones on my Home first page he said it is not working. He has not tried it yet either. Thank you.
The image of a woman writing/drawing on your homepage is not SEO friendly. It does not have a descriptive file name (it’s 4620765454.jpg) and it does not have descriptive alt text (it’s set to “1” which doesn’t describe the image at all).
File size-wise it’s fine, though could be compressed to save about 40-50 KB.
Thanks, Ashley.
I informed my web designer, unfortunately, he was from the start no good and never gave me any advice on SEO or suitable images.
I am looking for a global image do you think that’s better? What is your advice on the size I used S and M but now my web designer wants 1000 pix so I think its L.
I am looking for a site pay as you go or pay per image.
If you know a free download site that would be cool £ payment.
I am grateful for some help because it takes 10 weeks to get a 3-page website up and running:( pfff
how to restructure all our image to resize and compress to smaller size?
is there any SEO and compress plugin for wordpress?
thanks before for great article and nice page view
Amazing post! I just got started blogging and am glad I ran into this before I got addicted to memes and pictures. So you would compress first, then resize, correct?
Thanks again for sharing!
http://www.blossomthecreativist.com
Resize first, then compress.
Is there anyway to easily find out which of your images on your site are the largest? So we can go through and compress them. I have so many photos on my site already and it would be a hassle to go through, check them all, compress, and upload again.
There might be a third party service that does that, but unfortunately I’m not aware of it.
I suggest you focus on your most popular posts that bring in the most traffic.
Thanks for the tip!
A little late to the party.. but still a Great Post.. Thank You Ashley!!!
Jeff